System setup
This chapter explains how to install Nobø HUB, and how to add receivers and other system units.
Nobø HUB setup
Important info:
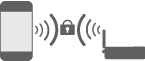
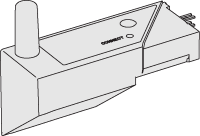
Nobø HUB communicates with wireless radio signals. Nobø HUB must be mounted on a wall for optimal range. Some building materials, like reinforced concrete, massive timber etc. may reduce the signal range. In the case of signals not reaching a receiver, moving the Nobø HUB 1-2 metres to the side could be enough to avoid the obstacle. Install the system, and make sure all your receivers react properly, before final mounting of the Nobø HUB on the wall.
System setup:
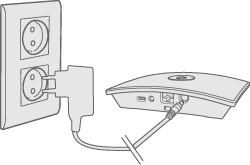
Connect the power cord to the Nobø HUB and plug it into a power outlet.
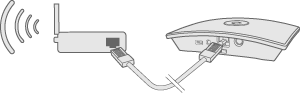
Nobø HUB must be connected by cable (ethernet cable) to a local network with a wireless router. The cable can be connected directly to the router, or to a wall outlet elsewhere in the building.
Make sure your smartphone or tablet is connected to the same wireless network and start NOBØ Energy Control APP. When connected to power and a local network, Nobø HUB will transmit its ID-code on the wireless network.
To install Nobø HUB, follow the APP setup wizard. The APP will search for an Nobø HUB, and display the results on the screen. Press the ID code corresponding to your Nobø HUB.
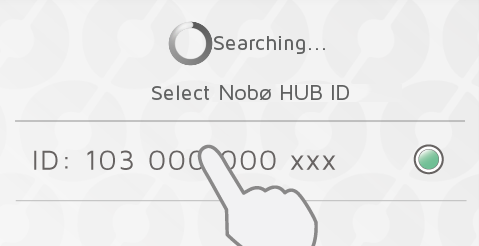
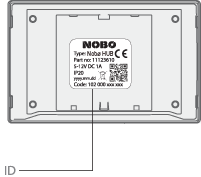
If more than one Nobø HUB is connected to the same wireless network, the correct one must be selected in the setup wizard. Check the ID-code at the back of the Nobø HUB and select the corresponding ID in the APP.
(NB! Only one Nobø HUB can be installed at a time.)
For security reasons, you will be asked to type in the 3 last digits of your Nobø HUB ID-code. The ID-code is at the back of your Nobø HUB.
Do not mount the Nobø HUB on the wall until the setup is finished. In case you need to check the ID-code again.
Control via the Internet
When the app has been connected to an Nobø HUB on a local network, the app can also be operated remotely via the Internet.
The system security is based on your local network being protected from unauthorized access. Please make sure your local, wireless network is password protected against intruders. Be careful when allowing others to access your network. Anyone who has connected their app to your Nobø HUB, will later be able to control it remotely via the Internet.
When the app and the Nobø HUB connect via a local network, they automatically exchange encryption keys. This is to ensure a secure, encrypted communication via the Internet by a robust AES encryption. The encryption keys are generated by the app, and are saved in the app and the Nobø HUB to prevent any online surveillance.
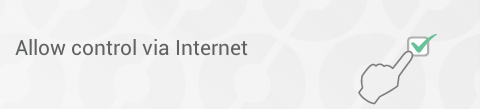
If you do not wish to control your system via the Internet, the "Allow control via Internet"-option can be switched off under “Settings”. This option can only be changed when connected to the local network. If the Internet control option is switched off and then back on again, all previous users (apps) are reset from accessing the Nobø HUB via the Internet. To regain access, the app and the Nobø HUB must exchange new encryption keys. This is done simply by starting the app while connected to the local network.
Advanced Nobø HUB setup
If the search for Nobø HUB in the setup wizard fails, and no HUBs are found, press “advanced” to install the Nobø HUB manually.
For advanced installation, you will need the IP-address allocated to the Nobø HUB on your network. The IP-address can be found by logging on to the router. See your wireless router manual, or ask your internet service provider for more info.
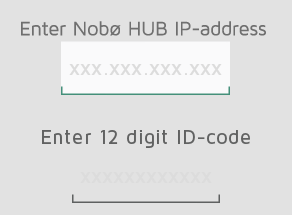
In the advanced setup screen, enter both the IP-address AND the entire 12 digit ID-code from the back of your Nobø HUB, and press “verify”.
If unsuccessful, please check the following:
(only relevant for users with special network configuration)
- Make sure there is no firewall between your wireless and cabled network (TCP-traffic must be allowed on port 27779.)
- Make sure your wireless network (connected to the APP) is the same logical local network (LAN) as your cabled network (connected to the Nobø HUB)
- Make sure your network allows UDP broadcast traffic (on IP 255.255.255.255, port 10000).
Adding receivers and transmitters
When Nobø HUB has been registered, other system units (receivers and transmitters) can be added. Select (+) “Add new > system unit” in the main menu.

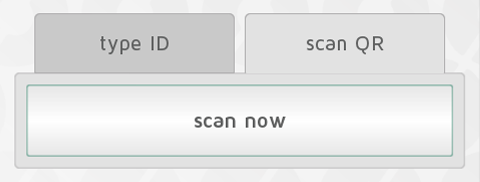
To install receivers, switch panels, sensors etc., their ID-code must be registered by the APP. This can be done in two ways:
- Manual registration
- Automatic search
Manual registration
Select “(+) Add new” in the main menu, select “system unit” and then “manual registration”.
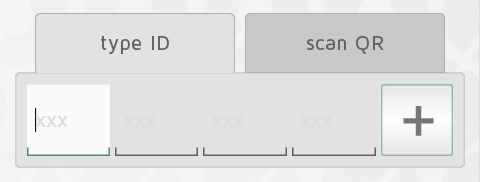
The ID-code is a 12 digit number printed on the
receiver. Enter this number into the textboxes on the screen. Press “+” to
enter more units at the same time. It is advised to register only one zone at a
time.
Many Nobø receivers have the ID code
printed as QR code. The QR code can be scanned from the APP.
Orion 512 products are not compatible with Nobø HUB.
Battery powered receivers or transmitters (TCU700, Nobø Switch) need pairing with the Nobø HUB if the ID-code has been added manually. During the installation, the APP will notify you when a unit needs pairing.
The unit is activated for pairing in the same way as for automatic search. See the unit user manual for more information.
Automatic search
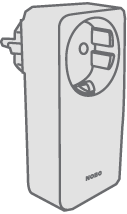
Most Nobø receivers, plus a few Orion700 products (R80 RSC-700, R80 TXF-700, TCU700 room thermostat, Safir glass heater) can connect to the APP and Nobø HUB by automatic search.
Select “automatic search” in the APP. Next, you will be asked to switch on your system unit, and the unit will send its ID-code to Nobø HUB. More than one unit can be connected at once. Just switch on one unit, and check that it appears in the APP overview before switching on another. The search can be paused if needed.
It is advised to register one zone at a time.
How to switch on a receiver/transmitter for Automatic Search

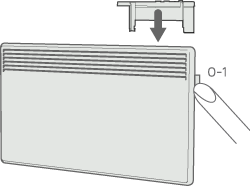
NCU-1R, NCU-2R, NCU-ER: insert the unit into the heater. Turn the heater’s power switch from OFF(0) to ON(1).
NTB-2R Room and floor thermostat: Slide the switch from standby to on.
R80 RSC700, R80 TXF700: insert the unit into the heater.
Turn the heater’s power switch from OFF(0) to ON(1).
TCU700: Press and hold the right button until
the menu appears. Press down and select EC700. Press the right button again to
confirm the selection. TCU700 will then connect to your Nobø HUB or Orion700 control unit.
Safir: Turn the heater’s power switch from OFF(0) to ON(1).
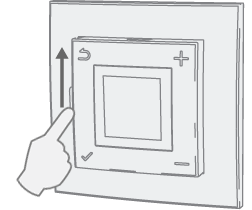
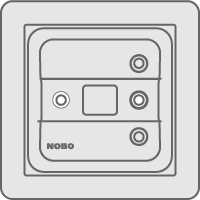
Nobø Switch SW4: Press the center of the switch once, so that all four corners are pressed down. The switch light flashes while searching for ECOHUB
R80 RDC 700 og R80 RXC 700: Require manual registration.
2NC9 700: Requires manual registration.
TRB700, TXB700: Require manual registration.
RCE 700, RS700 og RSX700: Require manual registration.
Name and assign units to a zone
When one or more ID codes are registered, each
unit should be given a name. Enter a name that is easy to recognise. E.g.
“Heater Dining room”, “Underfloor heating Bath” etc.
Every unit must be assigned to a zone. A unit
will be added to the previously selected zone, unless you choose a different
zone in the drop down menu. A new zone can also be added via the drop down
menu. Give the zone a name that is easy to remember. E.g. “Heat Living room”.
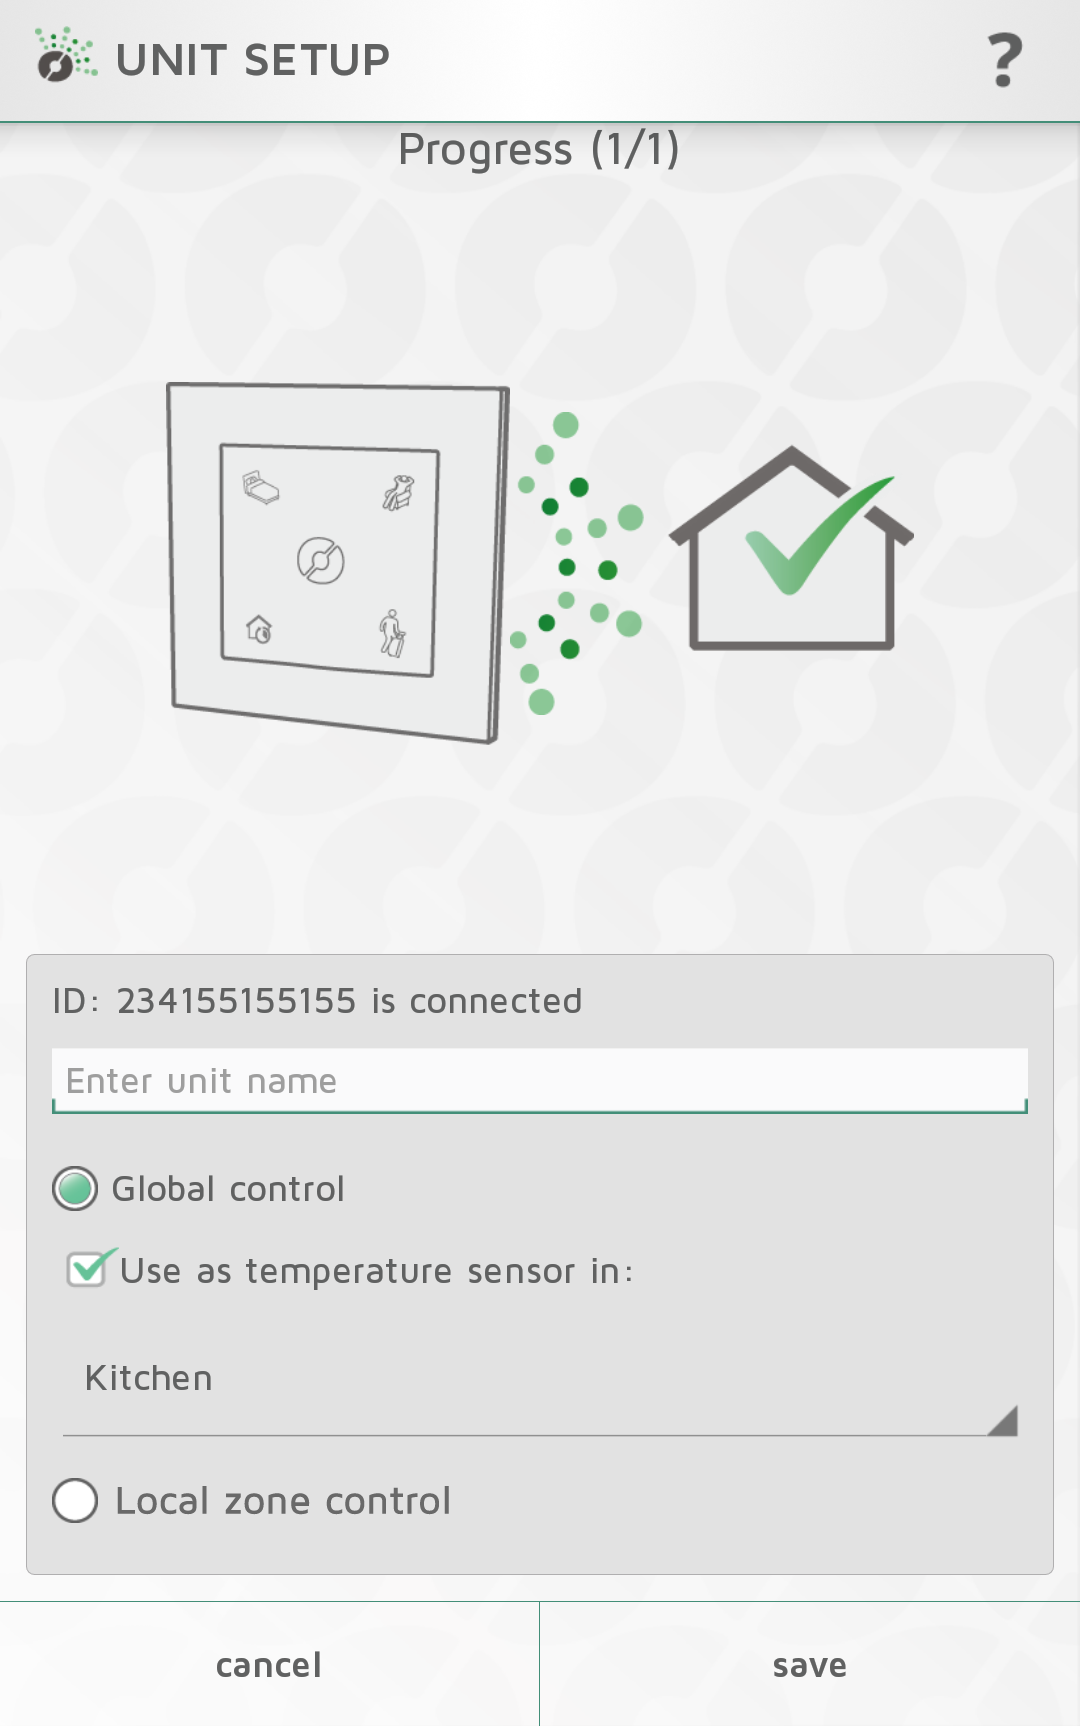
Assigning a zone to Nobø Switch
Nobø Switch has two possible configuration modes: Global control or Local zone control. When adding a Nobø Switch to the system, the preferred configuration mode is selected. Global control, enables the switch to control all zones. Local zone control enables Nobø switch to control one specific zone.
- Global Control:
When configured as a Global control, Nobø Switch overrides and controls any unlocked zones in the system. A Global Nobø Switch has the same functionality as the circle meny in the home screen. Select "Global control" in the unit setup screen to assign this functionality to a switch. At the same time, Nobø Switch can be used as a temperature sensor in a zone. The zone can be selected in the drop down menu.
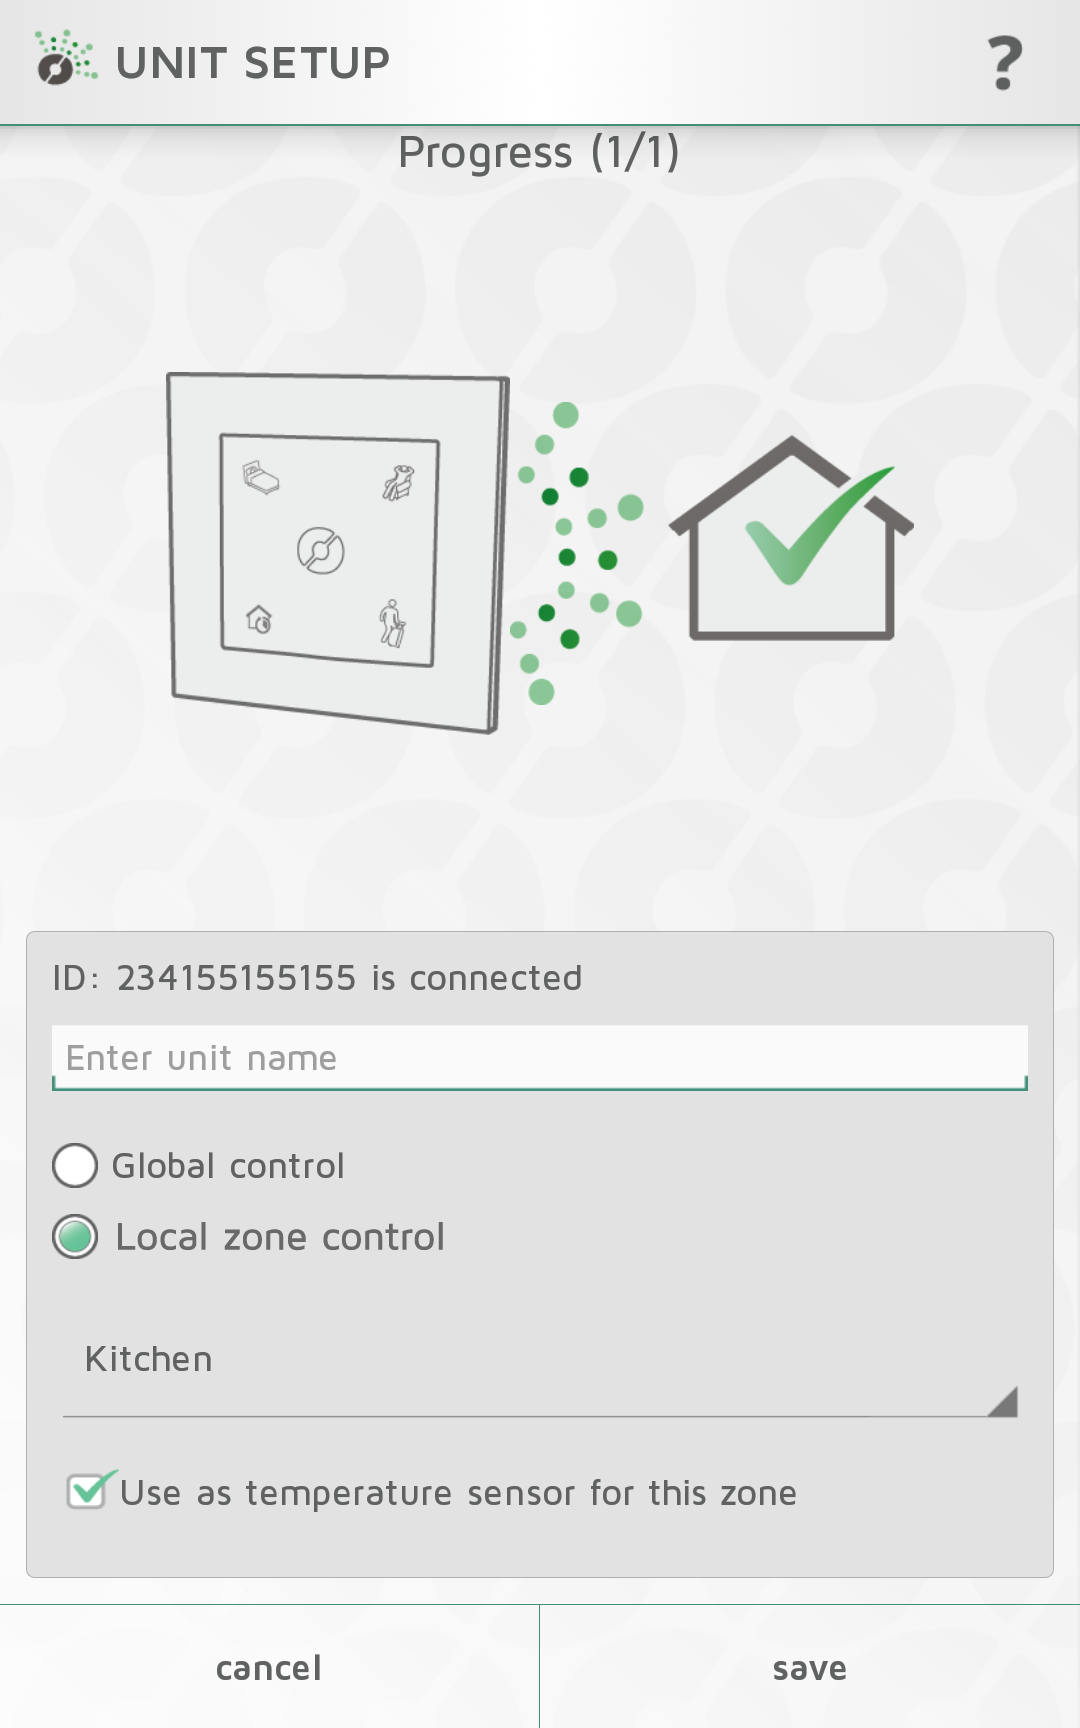
Local zone control:
When configured as a Local zone control, Nobø Switch is connected to one specific zone. Any overrides or operations from the switch only affects the connected zone. Select "Local zone control" in the unit setup screen to assign local control to the switch. The zone is selected in the drop down menu. As an option, Nobø Switch can also be used as a temperature sensor in the same zone.
Removing system units
All system units (receivers and transmitters), zones and weekly programs you have added yourself, can be removed from the Nobø HUB if need be. The Default weekly program cannot be deleted.
Remove receivers/transmitters
Receivers and transmitters are removed by pressing  in the menu, and selecting
  System Unit. Select one or more units for removal.
Remove zones
Press in the menu, and select  Zone. Select one or more zones for removal. NB! All
receivers/transmitters in the zone will be removed as well.
Remove weekly program
Press in the menu, and select Weekly Program. Select one or more programs for removal.
Zones using a removed program will return to the default program (factory settings). The Default program cannot be deleted.
Remove Nobø HUB
Removing Nobø HUB from an APP means the energy control system can no longer be controlled by this particular phone or tablet. Other phones or tablets connected to the same Nobø HUB will not be affected, and can still be used as normal.
To remove Nobø HUB, select in the menu, and then  Nobø HUB.