User manual
Nobo Energy Control system automatically controls electric heaters, lights, and other electrical appliances according to individually defined weekly programs.
The system will help you reduce energy bills, and make your household
more eco friendly, without compromising your comfort.

Before you start
This chapter will give you essential knowledge of terms and concepts used in the Nobø Energy Control system.
How does Nobø HUB work?
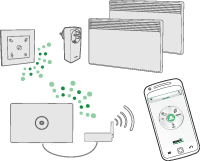
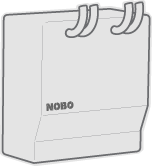
Nobø HUB is the central unit in the Nobø Energy Control System. The Nobø HUB controls heaters, lights and other electrical appliances according to your own weekly programs.
Nobø HUB is connected to your wireless network and communicates with Nobø Energy Control APP on your smartphone or tablet. From the APP, your home is controlled according to your needs and wishes.
You can control your home from anywhere in the world, as long as the app is connected to the Internet.
What is a receiver?
Nobø HUB sends radio signals to RECEIVERS that can be placed in heaters, power outlets or fuse boxes around your home. Each receiver has a unique ID code enabling Nobø HUB to send signals to the correct unit.
Nobø HUB is compatible with all NOBØ Orion700 receivers and NOBØ NCU receivers, but not with NOBØ Orion512 receivers.
List of receivers
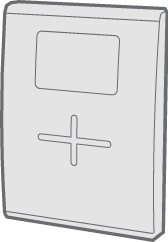
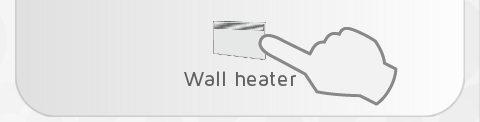
NTB-2R is a combined floor and room thermostat and power regulator for in-box mounting. COMFORT and ECO temperatures are set either on the receiver (thermostat), or with the NOBØ Energy Control APP Interface.

NCU-1R is a receiver for Nobø heaters NF and NT, controllable by Nobø HUB. COMFORT temperature setting is on the receiver (heater). ECO temperature is set with the NOBØ Energy Control APP interface.

NCU-2R is a receiver for Nobø heaters NF and NT, controllable by Nobø HUB. COMFORT and ECO temperatures are set either on the receiver (heater), or with the NOBØ Energy Control APP interface.

NCU-ER is a receiver for Nobø heaters NF and NT, controllable by Nobø HUB. COMFORT and ECO temperatures are set with the NOBØ Energy Control APP interface.

DCU-1R is a receiver for Dimplex heaters DF and DT, controllable by Nobø HUB. COMFORT temperature setting is on the receiver (heater). ECO temperature is set with the NOBØ Energy Control APP Interface.

DCU-2R is a receiver for Dimplex heaters DF and DT, controllable by Nobø HUB. COMFORT and ECO temperatures are set either on the receiver (heater), or with the NOBØ Energy Control APP Interface.

DCU-ER is a receiver for Dimplex heaters DF and DT, controllable by Nobø HUB. COMFORT and ECO temperatures are set with the NOBØ Energy Control APP Interface.
R80 RDC 700 is a receiver for Nobø heaters C2/C4, B4, T4,
P4/P6 and R3/R5, controllable by Nobø HUB.
COMFORT and ECO temperatures settings are on the receiver (heater).
R80 RXC 700 is a receiver for Nobø heaters C2/C4, B4, T4,
P4/P6 and R3/R5, controllable by Nobø HUB.
This receiver has no local controls. COMFORT and ECO temperatures are set with
the Nobø Energy Control APP interface.
R80 RSC 700 is a receiver for Nobø heaters C2/C4, B4, T4, P4/P6 and R3/R5, controllable by Nobø HUB. COMFORT temperature setting is on the receiver (heater). ECO temperature is set with the NOBØ Energy Control APP interface.
R80 TXF 700 is a receiver for Nobø heaters C2/C4, B4, T4, P4/P6 and R3/R5. R80 TXF 700 can be controlled by Nobø HUB via a room thermostat (TCU 700 or TXB 700). COMFORT and ECO temperatures are then set on the room thermostat.
R80 TXF 700 can also be controlled directly by Nobø HUB, if there is a Nobø Switch temperature sensor in the same zone. COMFORT and ECO temperatures are then set in the APP interface.
2NC9 700 is a receiver for Dimplex and ewt heaters 2NC8,
2NW5 and 2NW6. COMFORT temperature setting is on the heater, while ECO
temperature is set in Nobø Energy Control APP interface.
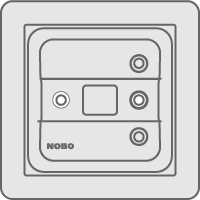
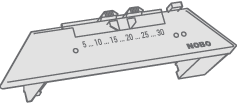
TRB 36 700 is a combined floor and room thermostat, and effect regulator for wall box mounting. COMFORT and ECO temperatures are set on the receiver (thermostat).
TXB 700 operates as a central room thermostat in a room with one or more Nobø C2/C4, T4, P4/P6, R3/R5 and Safir glass heaters. This thermostat controls up to 10 heaters in the room via radio signals. COMFORT and ECO temperatures are set on the receiver (thermostat).
TR36 is a combined floor and room thermostat for on wall mounting. COMFORT temperature is set on the receiver (thermostat). ECO temperature is set in the APP interface.
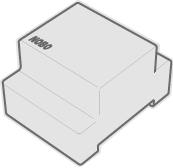
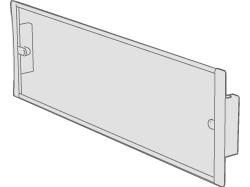
RSX 700 is a rail-mounted relay receiver for direct
control of electric loads. Signals from Nobø HUB
switches the loads on and off.
RS 700 is a flush mounted 10A receiver that switches
the load on and off according to signals from Nobø HUB.
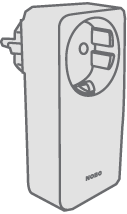
RCE 700 is a 10A control unit for power outlets, that switches the load on and off according to signals from Nobø HUB. Possible uses are lights and other appliances with a power cord, including heaters. COMFORT temperature is set on the heater.
TCU700 is a battery powered, wireless, room thermostat
controlling NOBØ Safir Glass Heaters and NOBØ heaters with R80 TXF radio
receiver. TCU700 communicates with the heaters through radio signals, and can
be connected to Nobø HUB. COMFORT and
ECO temperatures are set on the receiver (room thermostat).
Safir is a glass heater with an integrated radio receiver. Nobø HUB can control Safir via a room thermostat (TCU700 or TXB700). COMFORT and ECO temperatures are set on the room thermostat. As an alternative, Nobø HUB
can control Safir directly if there is a Nobø Switch temperature sensor in the same zone. In this case, COMFORT and ECO temperatures are set in the APP interface.
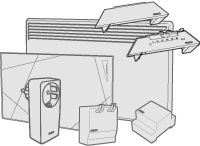
What is a transmitter?
A transmitter communicates messages to Nobø HUB upon certain events, like operating
a switch panel. A transmitter can also be a sensor (temperature, magnet
switches etc.) that automatically communicates events and status to Nobø HUB.
List of transmitters
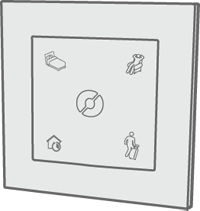
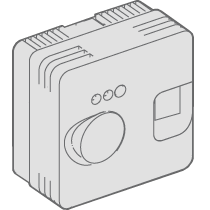
Nobø Switch SW4 enables you to manually set your home or single zones to NORMAL status, or temporarily override them to COMFORT, ECO or AWAY.
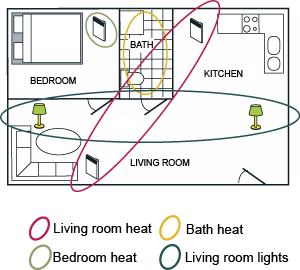
What is a zone?
Receivers that are supposed to follow the same weekly program and temperature settings, should be placed together in a ZONE in the APP. One example could be all the heaters in your living room. A ZONE is simply a group of receivers operating in the same manner.
Heaters/thermostats should not be placed in the same zone as lights or other appliances. One room can consist of several zones, and one zone can include receivers in different rooms.
All receivers in a zone should preferably have equal functionality. If a zone has both a heater connected to a simple ON/OFF receiver (e.g: RCE 700) and also another heater with an advanced receiver (e.g: NCU-2R), the simpler receiver will limit the functionality in the zone. The two heaters should each be given a separate zone, to be able to exploit the functionality of the advanced heater.
Appliances with special patterns of use (e.g. engine heaters) should each have a separate zone. Name each zone for easy recognition.
What is a weekly program?
Each ZONE must be given a WEEKLY PROGRAM
telling the receivers in the zone how to act during a week. For each day of the
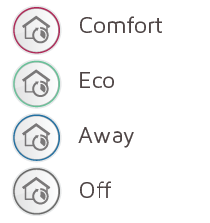
week you can specify periods as COMFORT, ECO, AWAY or OFF, and the receivers
will react accordingly:
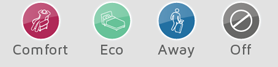
 COMFORT
Your preferred COMFORT temperature is set either on the heater, or in NOBØ Energy Control APP, depending on your type of receiver.
ON-OFF receivers will be ON when the zone is in COMFORT status.
 ECO
ECO
Your preferred ECO temperature is set either on the heater, or in NOBØ Energy Control APP, depending on your type of receiver.
ON-OFF receivers will be OFF when the zone is in ECO status.
 AWAY
AWAY
AWAY temperatur is fixed to 7°C and cannot be altered. ON-OFF receivers will be OFF when the zone is in AWAY status.
 OFF
OFF
All receivers are switched off completely.
System setup
This chapter explains how to install Nobø HUB, and how to add receivers and other system units.
Nobø HUB setup
Important info:
Nobø HUB communicates with wireless radio signals. Nobø HUB must be mounted on a wall for optimal range. Some building materials, like reinforced concrete, massive timber etc. may reduce the signal range. In the case of signals not reaching a receiver, moving the Nobø HUB 1-2 metres to the side could be enough to avoid the obstacle. Install the system, and make sure all your receivers react properly, before final mounting of the Nobø HUB on the wall.
System setup:
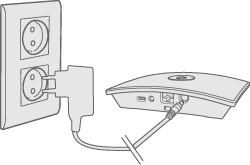
Connect the power cord to the Nobø HUB and plug it into a power outlet.
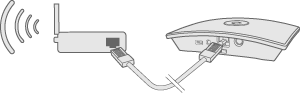
Nobø HUB must be connected by cable (ethernet cable) to a local network with a wireless router. The cable can be connected directly to the router, or to a wall outlet elsewhere in the building.
Make sure your smartphone or tablet is connected to the same wireless network and start NOBØ Energy Control APP. When connected to power and a local network, Nobø HUB will transmit its ID-code on the wireless network.
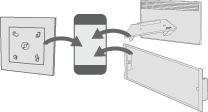
To install Nobø HUB, follow the APP setup wizard. The APP will search for an Nobø HUB, and display the results on the screen. Press the ID code corresponding to your Nobø HUB.
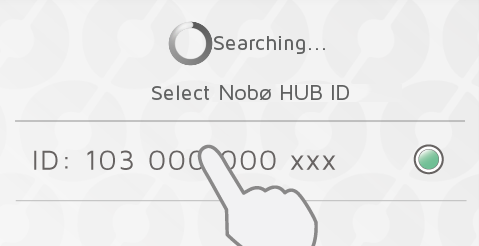
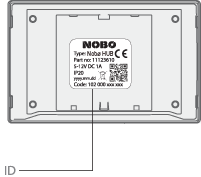
If more than one Nobø HUB is connected to the same wireless network, the correct one must be selected in the setup wizard. Check the ID-code at the back of the Nobø HUB and select the corresponding ID in the APP.
(NB! Only one Nobø HUB can be installed at a time.)
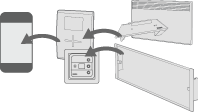
For security reasons, you will be asked to type in the 3 last digits of your Nobø HUB ID-code. The ID-code is at the back of your Nobø HUB.
Do not mount the Nobø HUB on the wall until the setup is finished. In case you need to check the ID-code again.
Control via the Internet
When the app has been connected to an Nobø HUB on a local network, the app can also be operated remotely via the Internet.
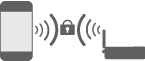
The system security is based on your local network being protected from unauthorized access. Please make sure your local, wireless network is password protected against intruders. Be careful when allowing others to access your network. Anyone who has connected their app to your Nobø HUB, will later be able to control it remotely via the Internet.
When the app and the Nobø HUB connect via a local network, they automatically exchange encryption keys. This is to ensure a secure, encrypted communication via the Internet by a robust AES encryption. The encryption keys are generated by the app, and are saved in the app and the Nobø HUB to prevent any online surveillance.
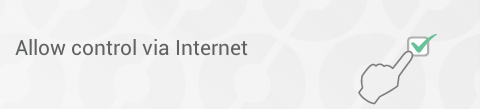
If you do not wish to control your system via the Internet, the "Allow control via Internet"-option can be switched off under “Settings”. This option can only be changed when connected to the local network. If the Internet control option is switched off and then back on again, all previous users (apps) are reset from accessing the Nobø HUB via the Internet. To regain access, the app and the Nobø HUB must exchange new encryption keys. This is done simply by starting the app while connected to the local network.
Advanced Nobø HUB setup
If the search for Nobø HUB in the setup wizard fails, and no HUBs are found, press “advanced” to install the Nobø HUB manually.
For advanced installation, you will need the IP-address allocated to the Nobø HUB on your network. The IP-address can be found by logging on to the router. See your wireless router manual, or ask your internet service provider for more info.
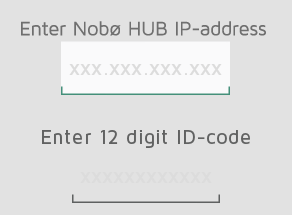
In the advanced setup screen, enter both the IP-address AND the entire 12 digit ID-code from the back of your Nobø HUB, and press “verify”.
If unsuccessful, please check the following:
(only relevant for users with special network configuration)
- Make sure there is no firewall between your wireless and cabled network (TCP-traffic must be allowed on port 27779.)
- Make sure your wireless network (connected to the APP) is the same logical local network (LAN) as your cabled network (connected to the Nobø HUB)
- Make sure your network allows UDP broadcast traffic (on IP 255.255.255.255, port 10000).
Adding receivers and transmitters
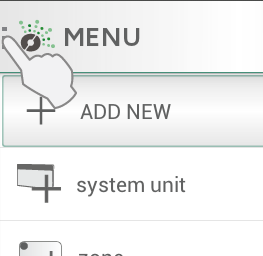
When Nobø HUB has been registered, other system units (receivers and transmitters) can be added. Select (+) “Add new > system unit” in the main menu.

To install receivers, switch panels, sensors etc., their ID-code must be registered by the APP. This can be done in two ways:
- Manual registration
- Automatic search
Manual registration
Select “(+) Add new” in the main menu, select “system unit” and then “manual registration”.
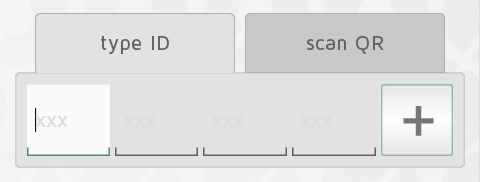
The ID-code is a 12 digit number printed on the
receiver. Enter this number into the textboxes on the screen. Press “+” to
enter more units at the same time. It is advised to register only one zone at a
time.
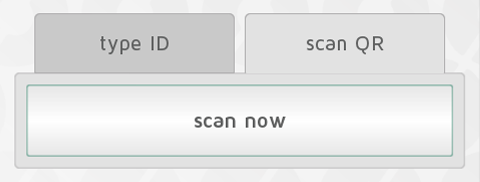
Many Nobø receivers have the ID code
printed as QR code. The QR code can be scanned from the APP.
Orion 512 products are not compatible with Nobø HUB.
Battery powered receivers or transmitters (TCU700, Nobø Switch) need pairing with the Nobø HUB if the ID-code has been added manually. During the installation, the APP will notify you when a unit needs pairing.
The unit is activated for pairing in the same way as for automatic search. See the unit user manual for more information.
Automatic search
Most Nobø receivers, plus a few Orion700 products (R80 RSC-700, R80 TXF-700, TCU700 room thermostat, Safir glass heater) can connect to the APP and Nobø HUB by automatic search.
Select “automatic search” in the APP. Next, you will be asked to switch on your system unit, and the unit will send its ID-code to Nobø HUB. More than one unit can be connected at once. Just switch on one unit, and check that it appears in the APP overview before switching on another. The search can be paused if needed.
It is advised to register one zone at a time.
How to switch on a receiver/transmitter for Automatic Search

NCU-1R, NCU-2R, NCU-ER: insert the unit into the heater. Turn the heater’s power switch from OFF(0) to ON(1).
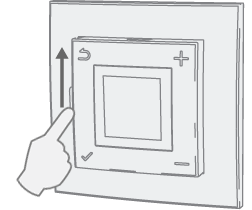
NTB-2R Room and floor thermostat: Slide the switch from standby to on.
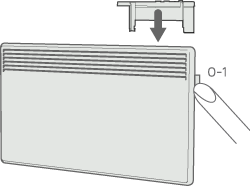
R80 RSC700, R80 TXF700: insert the unit into the heater.
Turn the heater’s power switch from OFF(0) to ON(1).
TCU700: Press and hold the right button until
the menu appears. Press down and select EC700. Press the right button again to
confirm the selection. TCU700 will then connect to your Nobø HUB or Orion700 control unit.
Safir: Turn the heater’s power switch from OFF(0) to ON(1).
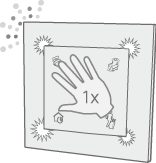
Nobø Switch SW4: Press the center of the switch once, so that all four corners are pressed down. The switch light flashes while searching for ECOHUB
R80 RDC 700 og R80 RXC 700: Require manual registration.
2NC9 700: Requires manual registration.
TRB700, TXB700: Require manual registration.
RCE 700, RS700 og RSX700: Require manual registration.
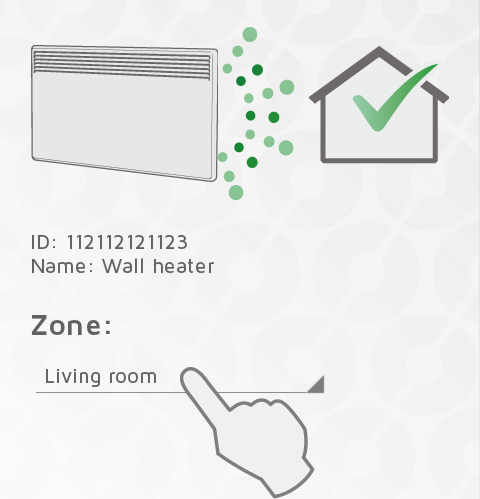
Name and assign units to a zone
When one or more ID codes are registered, each
unit should be given a name. Enter a name that is easy to recognise. E.g.
“Heater Dining room”, “Underfloor heating Bath” etc.
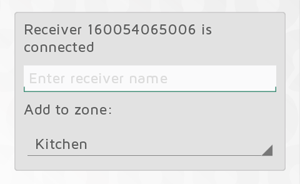
Every unit must be assigned to a zone. A unit
will be added to the previously selected zone, unless you choose a different
zone in the drop down menu. A new zone can also be added via the drop down
menu. Give the zone a name that is easy to remember. E.g. “Heat Living room”.
Assigning a zone to Nobø Switch
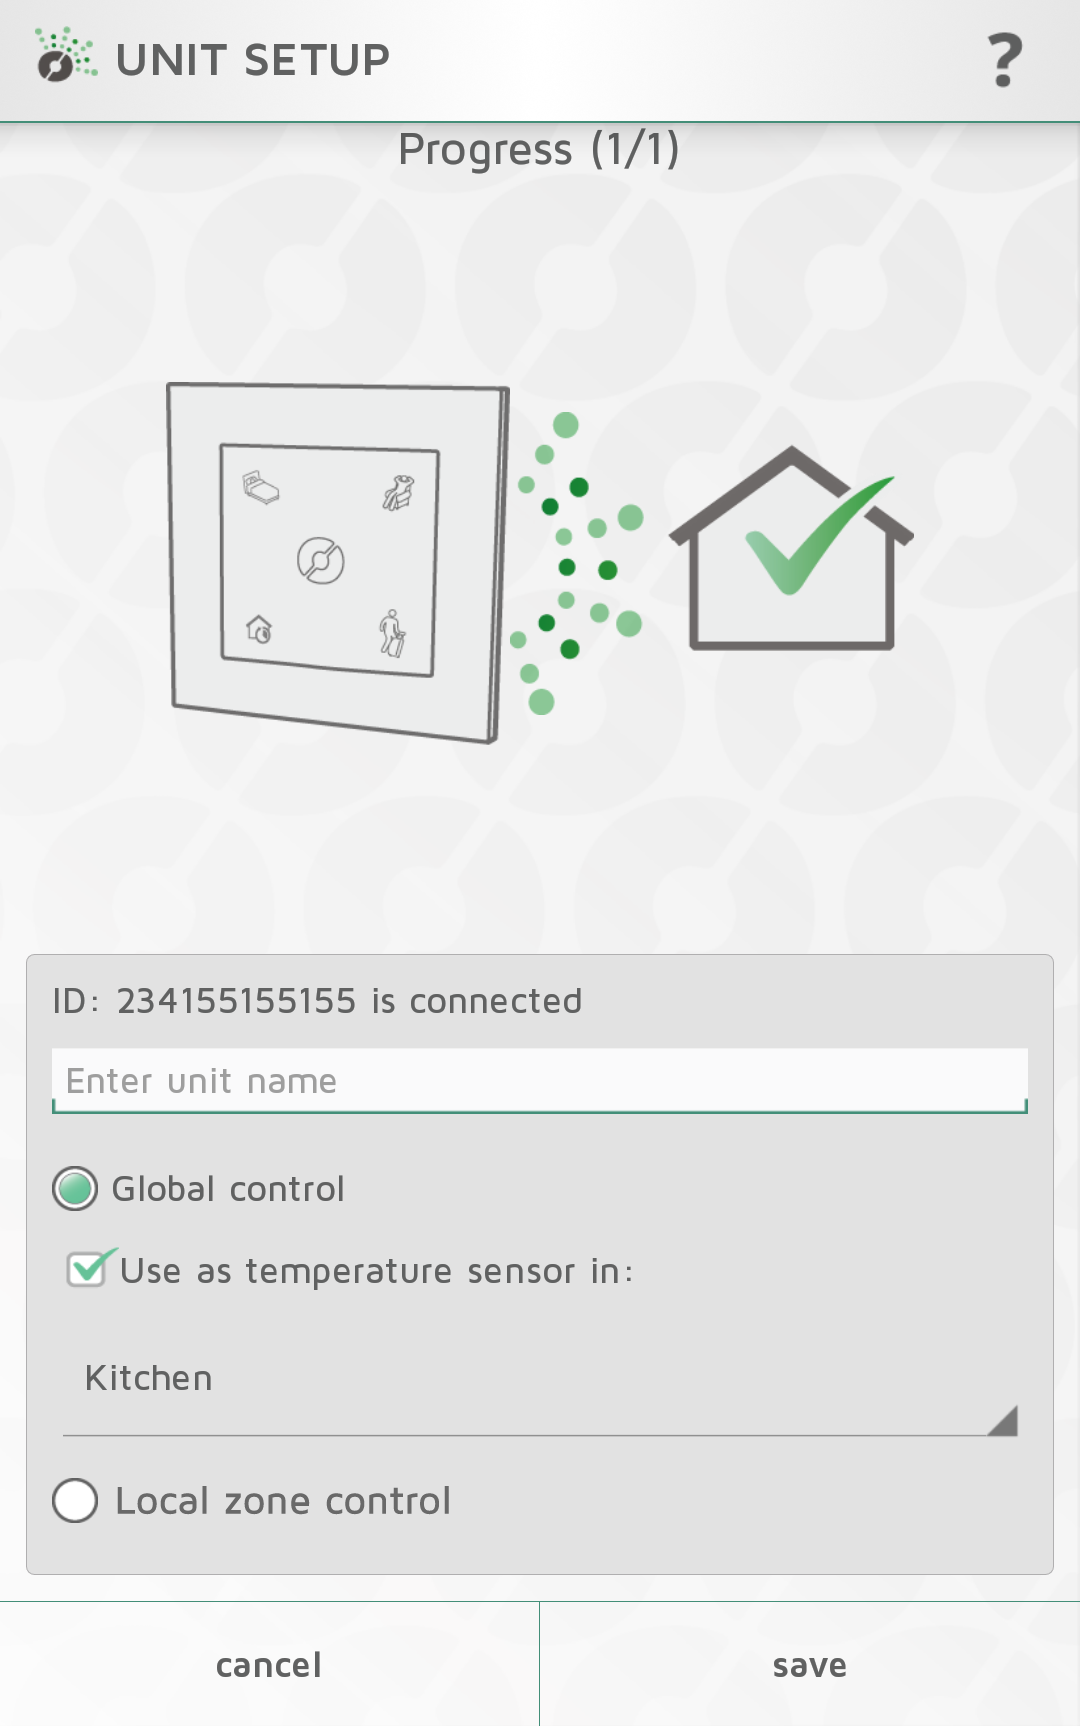
Nobø Switch has two possible configuration modes: Global control or Local zone control. When adding a Nobø Switch to the system, the preferred configuration mode is selected. Global control, enables the switch to control all zones. Local zone control enables Nobø switch to control one specific zone.
- Global Control:
When configured as a Global control, Nobø Switch overrides and controls any unlocked zones in the system. A Global Nobø Switch has the same functionality as the circle meny in the home screen. Select "Global control" in the unit setup screen to assign this functionality to a switch. At the same time, Nobø Switch can be used as a temperature sensor in a zone. The zone can be selected in the drop down menu.
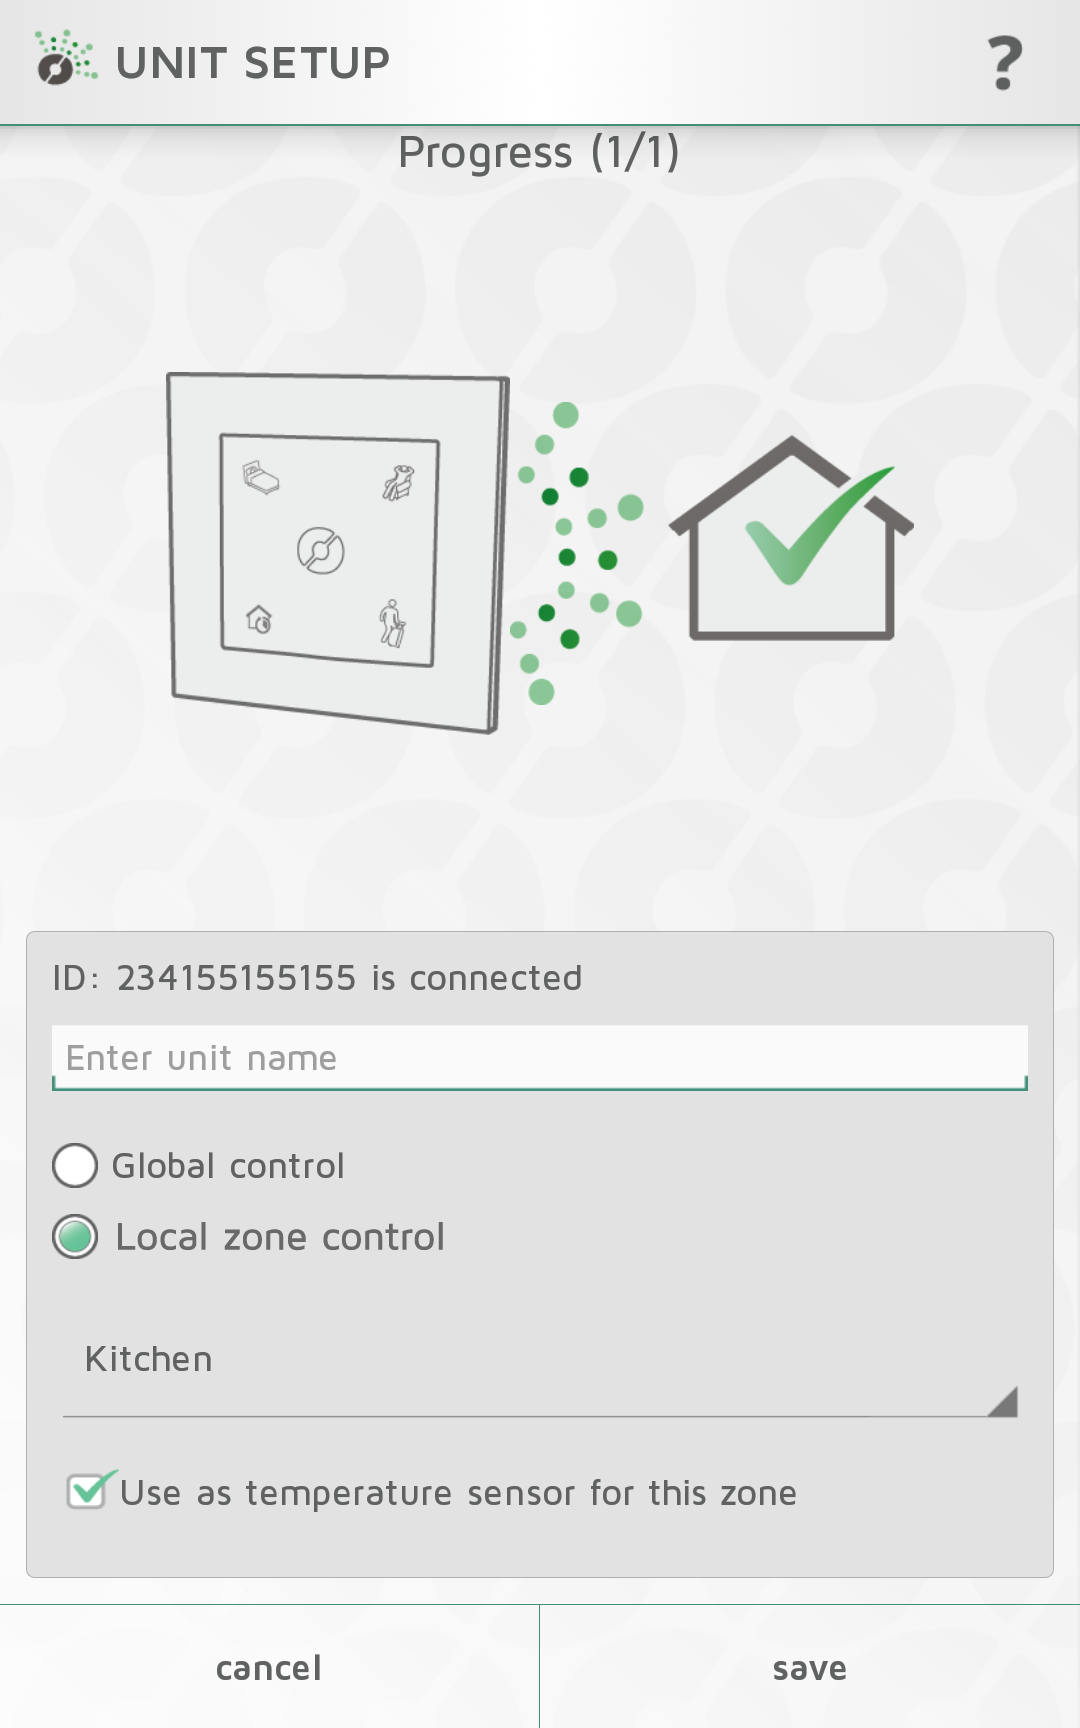
Local zone control:
When configured as a Local zone control, Nobø Switch is connected to one specific zone. Any overrides or operations from the switch only affects the connected zone. Select "Local zone control" in the unit setup screen to assign local control to the switch. The zone is selected in the drop down menu. As an option, Nobø Switch can also be used as a temperature sensor in the same zone.
Removing system units
All system units (receivers and transmitters), zones and weekly programs you have added yourself, can be removed from the Nobø HUB if need be. The Default weekly program cannot be deleted.
Remove receivers/transmitters
Receivers and transmitters are removed by pressing  in the menu, and selecting
  System Unit. Select one or more units for removal.
Remove zones
Press in the menu, and select  Zone. Select one or more zones for removal. NB! All
receivers/transmitters in the zone will be removed as well.
Remove weekly program
Press in the menu, and select Weekly Program. Select one or more programs for removal.
Zones using a removed program will return to the default program (factory settings). The Default program cannot be deleted.
Remove Nobø HUB
Removing Nobø HUB from an APP means the energy control system can no longer be controlled by this particular phone or tablet. Other phones or tablets connected to the same Nobø HUB will not be affected, and can still be used as normal.
To remove Nobø HUB, select in the menu, and then  Nobø HUB.
Menus and Functions
This chapter will explain the screens in the APP, and where to find the various functions.
STATUS and ZONES
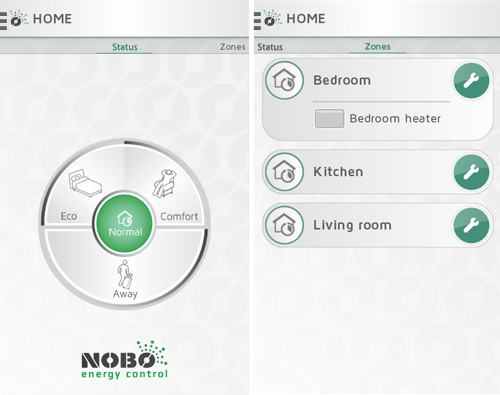
The HOME screen in Nobø Energy Control APP is divided in two views: STATUS and ZONES. Swipe sideways to navigate between the views.
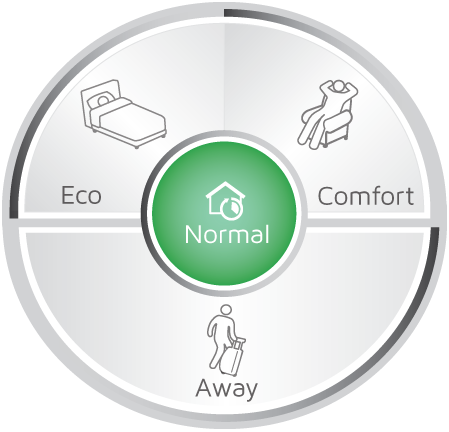
STATUS view (Circle menu) is the main control of your household, and shows active status. When the centre of the circle is green, your home is in Normal status. This means all zones automatically follow their individual weekly programs. The Circle menu allows you to override your home to “COMFORT”, “ECO”, or “AWAY” when needed. The circle shows the active status in green.
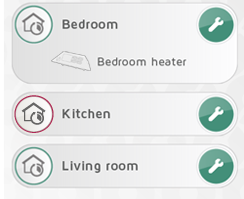
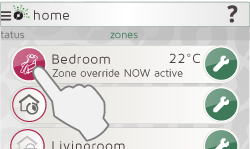
Swiping left takes you to the ZONES view, listing all the zones in your home. Tap a zone bar to display the system units within the zone. To enter the settings screen for a zone, tap the wrench icon.
The left icon indicates that the zone is following the normal weekly program. The colour of the circular rim corresponds with the current active status for the zone according to the program.
Other menu items are placed under the menu button top left.
Overrides
If you arrive home earlier than expected on a cold winter day, OR travel somewhere for the weekend, OR go on holiday for two weeks, the normal weekly program can easily be changed temporarily. This is called an override.
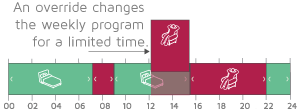
An override interrupts the normal weekly program, replacing it with the selected status “COMFORT”, “ECO” or “AWAY” for a limited time.
Nobø Energy Control has four types of overrides: CONSTANT, NOW, FROM-TO, and TIMER.
Override: CONSTANT
A CONSTANT override lasts until you choose to stop it manually. The override is useful if the time for return to Normal status is uncertain.
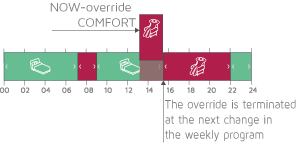
Override: NOW
A NOW-override lasts until there is to be a status change in the Normal weekly program. If the override applies to more than one zone, all zones must have a status change in the weekly program before the override is terminated. The system then automatically returns to Normal status. In the case of a weekly program with no daily status changes, a NOW-override is terminated at 3AM.
Override: FROM-TO
A FROM-TO override allows you to select date and time for when the override starts and stops.
Override: TIMER
A TIMER-override lasts the number of days and hours selected. Default TIMER duration is 2 days (48 hours) unless you change it.
Simple global overrides
In the HOME screen, the circle menu allows you to override all your zones to any status “COMFORT”, “ECO”, or “AWAY” for a limited time. You can terminate an override at any time by pressing “Normal” at the centre of the circle.
Comfort
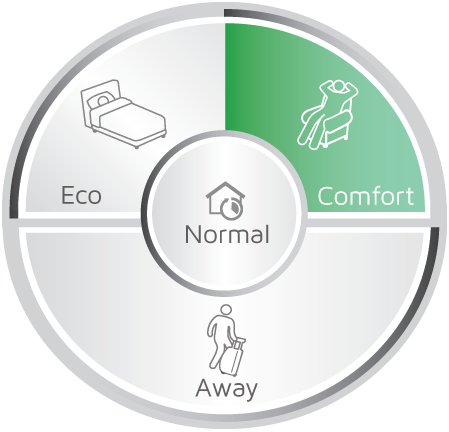
A single tap on ”COMFORT” starts a NOW-override. The Normal weekly program is put on hold, and all zones change to COMFORT status. The override is terminated automatically when all the zones have changed status once. In the case of a weekly program with no status changes, the NOW-override is terminated at 3AM. When the zones have changed back to Normal, the centre of the circle menu will turn green.
An override can be terminated at any time by pressing Normal or a different override.
COMFORT-override is useful if you come home
early on a cold day, and need to turn up the heat ahead of schedule.
Eco
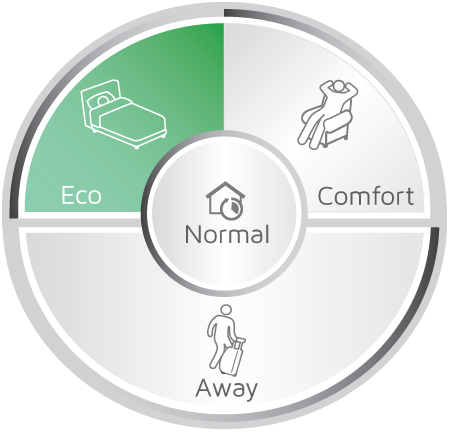
A single tap on ”ECO” starts a NOW-override. The Normal weekly program is put on hold, and all zones change to ECO status. The override is terminated automatically when all the zones have changed status once. In the case of a weekly program with no status changes, the NOW-override is terminated at 3AM. When the zones have changed back to Normal, the centre of the circle menu will turn green.
An override can be terminated at any time by pressing Normal or by pressing a different override.
ECO-override is useful if you go to bed early
and need less heat for the remainder of the evening. Other uses are when you
leave the house for a few hours and don’t need the heat on COMFORT level.
Away
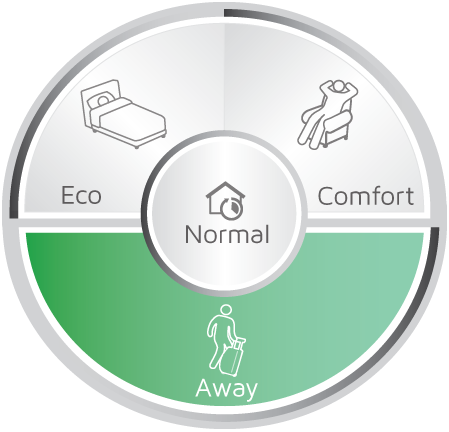
A single tap on “AWAY” starts a TIMER override.
The Normal weekly program is put on hold, and all zones change to AWAY status.
AWAY override is useful when you leave the house for 2 days or more. Default
AWAY override duration is 2 days (48 hours), before all zones return to Normal.
The default AWAY override duration can be changed in the SETTINGS menu.
Advanced global overrides
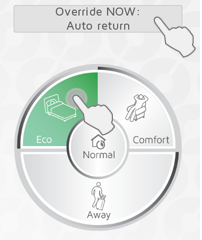
To enter advanced override options, press and hold the preferred status, Comfort, Eco or Away, in the Circle menu. Or when an override is already running, press the banner above the Circle for advanced options.
Four kinds of overrides are available in the advanced menu: CONSTANT, NOW, FROM-TO, and TIMER.
A FROM-TO override is defined by entering time and date for start and stop. A TIMER override is defined by entering its duration in days and hours.
Local zone overrides
Overriding a single zone can be done in the zones view.
Local zone overrides are not affected by global overrides activated in the circle menu.
Simple zone overrides
Tap the left icon once to start a simple NOW-override for the zone.

If the current status for the zone is Eco, Away or Off, the simple override changes the status to Comfort. If the current status is Comfort, the simple override changes the status to Eco. The icon changes appearance when an override is active, so that overridden zones are easily spotted in the list.
Tap the icon again to terminate the zone override.
A NOW-override is terminated automatically upon the next event in the weekly program, or at 0300 (3 AM).
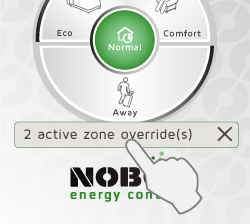
If one or more local zone overrides are active, a banner is displayed on the home screen. Tap the banner to terminate all local zone overrides.
Advanced zone overrides
Long press the left icon to enter the advanced zone override menu. Select the preferred status and type of override (CONSTANT, NOW, TIMER or FROM-TO).
To terminate the override, tap the left icon once. Alternatively, tap the banner in the home screen.
Zone settings
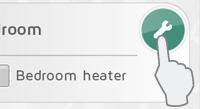
Press the wrench icon in the ZONES-view, to
enter settings for a particular zone. The zone settings screen provides options
for controlling the zone.
Zone unit overview
At the top is a list of all receivers and
system units included in the zone.
Tap the receiver icon for additional unit information.
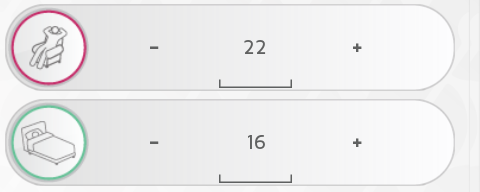
Temperature
COMFORT and ECO temperatures can be set in each
zone (provided the receivers in the zone have this functionality). Select your
preferred temperature according to the use of the room. E.g. COMFORT
temperature in the living room can be very different from COMFORT temperature
in the bedroom.
Temperatures are set either on the receiver or
in the APP. If in doubt, check your receiver instructions.
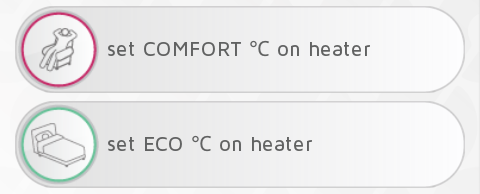
If APP temperature settings are not available,
you will be asked to set the temperatures on the heater.
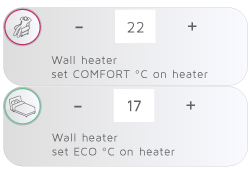
When a zone contains more than one type of
receiver, you may be asked to set temperatures both on certain heaters, and
from the APP. (E.g. If there are R80 RDC and R80 RXC receivers in the same
zone.)
AWAY status sets the zone in frost protection
mode at 7°C.
This temperature is fixed.
OFF status means all receivers are switched off completely.
When using basic ON/OFF receivers to control
heaters (e.g. RCE 700 socket receiver), COMFORT temperature is set on the
heater. ECO and AWAY are not available when using ON/OFF receivers, and the
heaters are then switched off. Make sure
the zone is protected against damage due to frost!
ON/OFF receivers are useful when controlling
lights and other appliances. The appliance is switched on when in COMFORT, and
otherwise off.
Normal weekly program
A zone can have one active weekly program at a
time. When the system is in Normal status, the zone will follow the weekly
program.
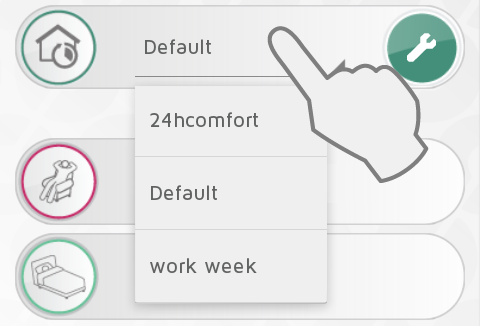
Active weekly program is selected in the drop down menu.
Weekly programs can be altered to suit your
needs, and new programs can be added. Press the wrench under NORMAL WEEKLY
PROGRAM options to edit weekly programs.
The system has a predefined, “Default”, weekly program. This program cannot be altered.
Disable global overrides for a zone
If a zone should not be affected by any
global overrides in the Circle Menu, select “Disable global overrides” in the zone settings.
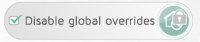
The zone will then follow the Normal program,
even if there is an active global override. The zone can still be overridden locally, both via the ZONES view or via a local Nobø Switch.
In the ZONES view, the “Normal” icon has a
padlock symbol when global overrides are disabled in a zone.
Unit info
Press a receiver icon in the zone settings screen for additional unit information (ID-code, name and zone). In this screen the unit can be renamed or moved from one zone to another.
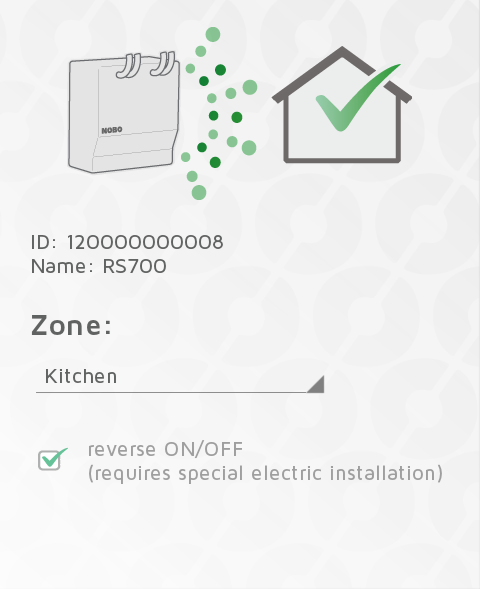
Receivers RS700 and RSX700 have the possibility for reversed ON/OFF setting. This requires special electric installation by a certified installer.
Renaming zones and receivers
Rename a zone:
Enter zone settings and press the pencil icon 
Rename a receiver/transmitter:
Press the receiver icon in zone settings to enter the unit info screen.
Press the pencil icon to rename the unit.
Moving receivers
A receiver/transmitter can be moved from one zone to another.
Press the unit icon in the zone settings screen. Select the new zone in the drop down menu.
Weekly programs
All weekly programs can be altered to suit your
needs, and new programs can be added.
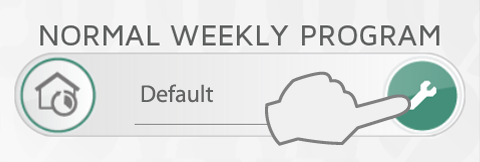
Press the wrench under NORMAL WEEKLY PROGRAM options to edit weekly programs.
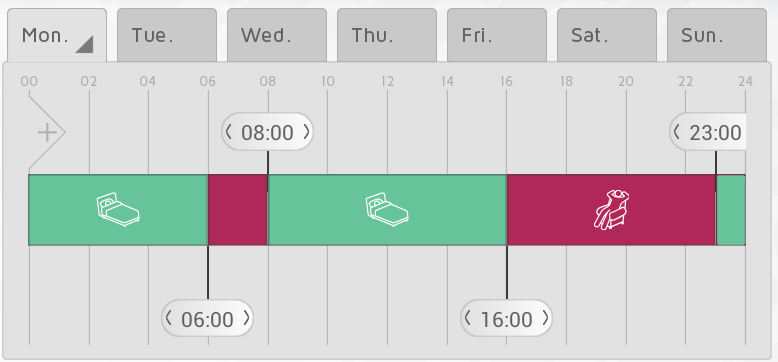
A weekly program consists of a 24 hour timeline for each day of the week.
The timeline can be divided into periods. Each period is set to a selected status, COMFORT, ECO, AWAY or OFF. Basic ON/OFF receivers will be switched off when not in COMFORT.
Add new weekly program
Press  to create a new weekly program.
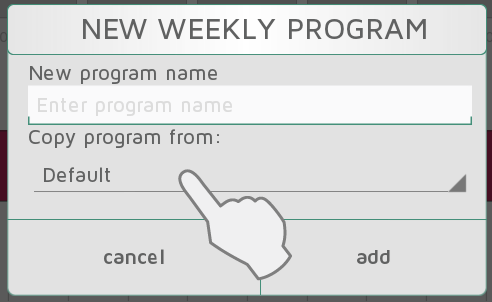
Enter a program name according to your needs (e.g. “work week”, “at home”). You can copy the timeline from an existing program into the new program as a starting point to save time. Select the program to copy from in the drop down menu. Changes made are saved automatically.
Edit a weekly program
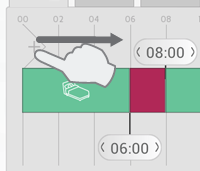
Touch and drag new sections into the timeline from the left side of the timeline bar.
Add the number of sections needed and place them according to your time schedule.
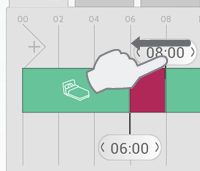
Delete a section by dragging the banner onto a neighbouring banner.
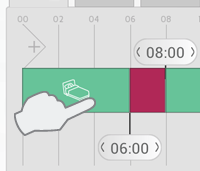
Press a period in the timeline to select the required status.
Select COMFORT, ECO, AWAY or OFF as status for the period.
Copy a daily program
When several of the days in your weekly program
should be the same (e.g. working days), one day can be copied onto other days.
This saves some work when setting up a weekly program.
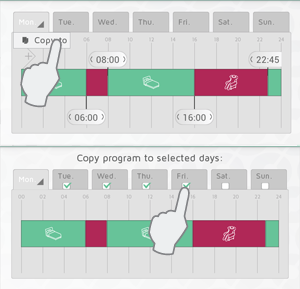
Press the tab with the program to be copied
(e.g. Monday), and select  . Then select the days you want to copy the
program to. Press
. Then select the days you want to copy the
program to. Press  to confirm.
Settings
In the main menu under «settings», you can set default duration for AWAY overrides, and also define access via the Internet.
You will also find information on software version and licenses.
AWAY override

Select Settings in the menu to change the default time period for AWAY override. The factory setting is 2 days.
This setting applies to both the circle menu in the APP, and also any Nobø Switch connected to the same Nobø HUB.
Allow control via the Internet
If you do not wish to control your system via the Internet, the Allow Internet control-option can be switched off under “Settings”. This option can only be changed when connected to the local network. If the Internet control option is switched off and then back on again, all previous users (apps) are reset from accessing the Nobø HUB via the Internet. To regain access, the app and the Nobø HUB must exchange new encryption keys. This is done simply by starting the app while connected to the local network.
Additional products
Products providing additional features to Nobø Energy Control.
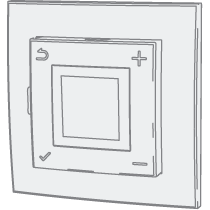
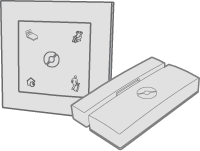
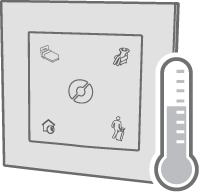
Switch panel Nobø Switch SW4
The buttons on Nobø Switch correspond with NORMAL, COMFORT, ECO and AWAY in the Circle Menu. You can install any number of Nobø Switch in your home, according to your needs. (e.g: by the entrance door, in the bedroom etc.)
To add a Nobø Switch, select (+) “Add new” and “system unit” in the menu, just like adding a receiver.
Assigning a zone to Nobø Switch (available in 2018)
Nobø Switch has two possible configuration modes: Global control or Local zone control. When adding a Nobø Switch to the system, the preferred configuration mode is selected. Global control, enables the switch to control all zones. Local zone control enables Nobø switch to control one specific zone.
- Global Control:
When configured as a Global control, Nobø Switch overrides and controls any unlocked zones in the system. A Global Nobø Switch has the same functionality as the circle meny in the home screen. Select "Global control" in the unit setup screen to assign this functionality to a switch. At the same time, Nobø Switch can be used as a temperature sensor in a zone. The zone can be selected in the drop down menu.
Local zone control:
When configured as a Local zone control, Nobø Switch is connected to one specific zone. Any overrides or operations from the switch only affects the connected zone. Select "Local zone control" in the unit setup screen to assign local control to the switch. The zone is selected in the drop down menu. As an option, Nobø Switch can also be used as a temperature sensor in the same zone.
When operated, a green light flashes once on the Nobø Switch, to confirm that Nobø HUB has received the signal. If the Nobø Switch does not flash green, try moving it closer to the Nobø HUB and check again. Or try moving the Nobø HUB. Some building materials, like reinforced concrete, massive timber etc., may reduce the signal range. In such cases, moving the Nobø Switch or Nobø HUB 1-2 metres to the side could be enough to avoid the obstacle.

Make sure Nobø Switch confirms with a green flash before mounting it in the desired location.
NB!: Both Nobø Switch and Nobø HUB must be mounted on a wall for optimal range.
Nobø Switch SW4 functions:
Push NORMAL (bottom left), your zone(s) will automatically follow their predefined weekly program.
Push COMFORT (top right) or ECO (top left), and a NOW-override is activated. The zone(s) will automatically return to NORMAL upon the next change in the weekly program.
Push AWAY (bottom right) to activate a TIMER-override. The zone(s) return to NORMAL after the predefined time has run out. Default TIMER setting is 2 days. The default time can be changed in the settings menu. When the default time is changed, it applies to the Circle menu and all Nobø Switches connectoed to the system.
Zones where “Disable global overrides” is activated, will not be affected when operating a global Nobø Switch.
Using a temperature sensor in Nobø Switch
Nobø Switch can act as an external temperature
sensor. The sensor must be located in the same room as the heater it is controlling.
The room temperature is registered and communicated to the Nobø HUB.

In a zone where Nobø Switch operates as a temperature sensor, the room temperature is shown in the zone list.
When Nobø Switch operates as a temperature sensor in a zone with NCU receivers, these heaters will automatically regulate according to the temperature measured by the Nobø Switch. If the Nobø Switch has a flat battery, or is out of range, the heaters will regulate according to their in-built temperature sensor.
Nobø Switch temperature sensor can replace TCU700 in installations with Safir glass heater and heaters with R80 TXF 700.

Do not place the temperature sensor in direct
sunlight, close to a heat source (e.g. a fireplace) or in a closed container
(e.g. inside a closet). Placing it on the wall, close to where you normally
stay in the room, is preferable.
Nobø Switch and Safir/R80-TXF700
Nobø Switch and Nobø HUB combined can replace the room thermostats TCU700 or TXB 700 in installations with Safir glass heater or heaters with R80 TXF700 receivers.
When combining Nobø Switch with Safir glass heater/heaters with R80 TXF700, both the heaters ID-codes AND Nobø Switch are added to the same zone in the APP. Temperatures are then set in the APP interface.
Alternatively, the Nobø HUB can be used to control installations with TCU700 / TXB700 room thermostats. The installed heaters (Safir glass heater / R80 TXF700) must be added to the room thermostat (TCU700 / TXB700). ONLY the room thermostat is then added as a receiver in Nobø HUB. Temperatures must be set on the room thermostat.
Examples of use
This chapter gives some examples and scenarios of use on Nobø Energy Control.
Day to day uses
Carrie has just bought Nobø HUB with a few heaters and a couple of power outlet controls. She plans to divide her apartment into four zones. A zone for her bedroom heater, a zone for her kitchen and living room heaters, a zone for the underfloor heating in the bathroom, and a zone for the outdoor lights and a lamp in the kitchen window. The latter is convenient for making the house seem inhabited when she is away on holiday.
She adds the receivers using “automatic search” on her phone APP, one zone at a time to avoid confusion. She names each zone and receiver with easily recognisable names. This makes it simple for both herself and her best friend who often borrows the apartment in the summer.
Finally she enters zone settings for each zone, and makes a weekly program for each one. For the bedroom, she makes a program that turns on the heat before she gets up on weekdays. On the heater she sets the ECO-setting to 14 degrees and the COMFORT setting to 19 degrees. On weekends, she enjoys reading in bed for a while in the morning. She then adapts the weekly program to keep the heat on for a bit longer on Saturday and Sunday mornings.
To save energy, she lets the program turn the bathroom and kitchen/living room heat to ECO when she is at work on weekdays.
If she goes away for the weekend, she conveniently presses the AWAY button on the switch panel by the entrance door. All heat zones then switch to AWAY status. In the light zone, she has selected “disable overrides” in zone settings. This ensures the lights will go on and off as usual.
All zones return to Normal after 2 days when she comes home.
Vacation
Carrie is going on vacation and wants all of her heating in AWAY status when she is gone. She also wants to ensure her coffee maker, TV and other appliances are off. At the same time she wants her kitchen and outdoor lights to go on an off to make the house seem inhabited.
In the zone overview screen her lights are placed in separate zones, and Carrie has selected “Disable global overrides” in the light zones. The lights will then follow their Normal Weekly Program even if the rest of the house is set to AWAY.
Carrie takes out her phone and presses and holds AWAY in the Circle Menu for advanced override settings. She selects FROM-TO and enters the time and date for leaving and returning. This ensures her saving energy and money while away, and still her house seems inhabited.
Carrie has done a smart thing by making a zone with a radio connected to a power outlet controller. She has selected “Disable global overrides” to make sure the zone follows the Normal program, and makes it turn on for a while in the evening. This enhances the impression that someone is home.
Weekly commuting
Owen is commuting on and off during the week, and often he does not know how many days of the week he will be gone. He wants to save money by turning down the heat when he is gone, but still wants the house to seem inhabited.
Owen has made a zone with a few lamps to go on and off automatically. He has selected “Disable global overrides” to make sure the lights always follow their Normal Weekly Program. On his way out he picks up his phone and long presses AWAY in the Circle Menu. He then selects CONSTANT override. The house will then go to AWAY status, except for the lights.
System upgrade from Orion 700
Owen has NOBØ Orion 700 control system installed in his house. Now he wishes to upgrade his system to Nobø HUB to be able to control his house from his phone. He has sought advice from an installer and learned that his old Orion 700 receivers are compatible with Nobø HUB. This means he can keep his old receivers.
Owen downloads NOBØ Energy Control APP to his phone and connects Nobø HUB to power and his wireless router. When the HUB is installed, he is ready to add his receivers.
Owen wants to do some changes to his old system setup, and makes a plan on how to group his receivers in new zones. Then he adds the receivers in the APP, one zone at a time. His older receivers need to be registered manually by entering the ID code written on each receiver. Recent receivers can be added by “automatic search”. Finally, he makes a weekly program for each zone.
When Owen has finished the setup, his girlfriend Mary wants the same setup on her phone. Mary downloads NOBØ Energy Control APP and starts the installation. Her phone discovers the Nobø HUB on the wireless network. When connected to the HUB, her phone automatically downloads all the settings, zones and receivers registered by Owen. Now they both can operate the system as they would like.
Troubleshooting
No light on Nobø HUB
Cause |
Action |
Nobø HUB is not connected to power. |
Make sure the supply cable is well connected to both power outlet and Nobø HUB. |
Nobø HUB is out of order. |
Replace Nobø HUB with a new one (contact your local dealer) |
to the top
No Nobo HUB found during setup
Cause |
Action |
Nobø HUB is disconnected |
Make sure Nobø HUB is connected to power and a network. |
Nobø HUB is connected to a different network than the APP. |
Make sure your wireless network (which is connected to the APP) is on the same local area network (LAN) as your wired network (which is connected to the Nobø HUB ). |
The network has a firewall or other restrictions. |
This is mainly relevant within companies or organizations with an advanced network configuration:
Make sure there is no firewall between your wired and wireless network. (TCP-traffic must be allowed on port 27779).
For the APP to discover the Nobø HUB automatically, the network must allow UDP broadcast on port 10000 and/or UDP multicast on port 10001. If this is not possible or desirable, Nobø HUB can be given a static IP-address from the router/DHCP server, and then connected via the “advanced” option in the APP setup wizard. |
| The network router has an error that prevents the system from working properly. |
More info |
Nobø HUB is busy |
If the Nobø HUB light is flashing, a software update is being downloaded. Please wait until the light is still and try again. |
to the top
Control via the Internet does not work
Cause |
Action |
The network router has an error that prevents the system from working properly. |
Nobø Energy Control is based on standard network technologies that should be compatible with all routers. We do our best to ensure that the system runs flawlessly anywhere. However, we have experienced that some network routers have issues that prevent the system from working properly: - ZyXEL P2602: Does not work at all. Some customers have received a new router from their Internet Provider (ISP) after explaining the problem to their customer support.
To work around such problems, combined modems and network routers can be set to "bridge mode". Then another network router can be connected to the first one to better provide the wired and wireless networks.
|
You are using a version of the app with a known issue. |
Please make sure that you have updated your app to the newest available version, to fix some known issues. Your app can be updated in Google Play (for Android) or Apple App Store (for iOS – iPhone/iPad). |
The app has not been connected to the Nobø HUB via the local network (LAN) after upgrading to the latest version. |
When the app and Nobø HUB have been upgraded to a version that supports control via Internet, each app must first be connected on the local network to exchange encryption keys with the Nobø HUB.
Control via the Internet only works after you have started the app on the local network at least once after the upgrade. |
Nobø HUB is not updated to the latest version |
Control via the Internet requires that the Nobø HUB is running software version 66 or higher. You can check this in the app under Menu > Settings > Nobø HUB info. The Nobø HUB has an automatic update function. If your Nobø HUB is not automatically updated, please check that the Nobø HUB is connected to a network with a good Internet connection.
See also the troubleshooting section on "Nobø HUB is not updated automatically" |
The app is not updated to the latest version |
Control via the Internet requires that the Nobø Energy Control app is running software version 3 or higher. You can check this in the app under Menu > Settings > App info. If you cannot find this information in the app, this means you have an older version. Please go to the AppStore (iPhone/iPad) or Google Play (for Android) to update the app. |
Control via Internet is turned off in the app settings |
Control via Internet is enabled by default, but can be turned off in the app under Menu > Settings. Start the app while connected to your local network (LAN) and make sure the checkbox "Allow control via Internet" is checked. |
The app has no Internet connection |
Check that your mobile/tablet device has a working Internet connection. This can for example be checked by loading a website on your mobile/tablet browser. |
The Nobø HUB has no Internet connection |
Please make sure the Nobø HUB is connected to a network that has a normal Internet connection. Nobø HUB cannot be controlled via the Internet if it is connected to a local network (LAN) that is isolated from the Internet. - The Nobø HUB has a green light showing the current status of the HUB:
- Constant green light: Fully connected to local network, Nobø Update Server and Nobø Proxy Server. Nobø Update Server is used for automatically updating Nobø HUB. Nobø Proxy Server enables control via internet.
- 1 x blink: Not connected to a network.
- 2 x blink: Connected to local network, but not connected to Nobø Update Server or Nobø Proxy Server.
- 3 x blink: Connected to local network and connected to Nobø Update Server, but not Nobø Proxy Server.
- 4 x blink: Connected to local network and connected to Nobø Proxy Server, but not Nobø Update Server.
- Continuous blinking for around 45 seconds: Automatic software update in progress.
- No light: Nobø HUB has no power.
|
The Nobø HUB is connected to the Internet behind unusually strict network firewalls |
Common firewall setups in network routers intended for private home use need no modifications from default settings. However, if you have a special/advanced network setup (e.g. within a company) then you must consider the following: The network must allow Nobø HUB outgoing TCP traffic on port 27778 to be controlled via the Internet. |
The app is connected to the Internet behind unusually strict network firewalls |
Common cellular network connections (2G/3G/4G) and conventional firewall setup in network routers intended for private homes need no modifications from default settings. However, if you have a special/advanced network setup (e.g. within a company) then you must consider the following: The network must allow the devices using the Nobø Energy Control app outgoing TCP traffic on ports from 27790 through 27799 to control via the Internet. |
Other |
Please check if the system works using a different mobile/tablet if you have the opportunity to do so. If possible, you can also try connecting the Nobø HUB to another network, to see if it works there. This can help determine the cause of the problem.
If you still cannot make control via Internet work properly, please contact your local reseller or Glen Dimplex Nordic support and have the following information ready:
- Nobø HUB serial number/ID (available in the app under Menu > Settings, 12 digits, for example "102000123123")
- Nobø HUB software version (available in the app under Menu > Settings, for example "114")
- Nobø HUB Control Application software version (available in the app under Menu > Settings, for example. "3.0.5087.13040")
- Name and model of the network router your Nobø HUB is connected to (for example. "DLink DIR-655"), and any information about special network setup if any (e.g. separate/advanced firewalls or firewall settings, any web proxies etc.)
Glen Dimplex Nordic support can be reached by e-mail at support@glendimplex.no or phone +47 74 82 91 00 (in Norwegian or English). |
to the top
Nobø HUB is not updated automatically
Cause |
Action |
The Nobø HUB is not connected to the Internet, or is connected to a network that uses special firewall settings. |
Nobø HUB has an automatic update function. If your Nobø HUB is not automatically updated, please check that the Nobø HUB is connected to a network that has a good Internet Connection. The Nobø HUB has a green light showing the current status of the HUB: Constant green light: Fully connected to local network, Nobø Update Server and Nobø Proxy Server. Nobø Update Server is used for automatically updating Nobø HUB. Nobø Proxy Server enables control via internet.1 x blink: Not connected to a network.2 x blink: Connected to local network, but not connected to Nobø Update Server or Nobø Proxy Server.3 x blink: Connected to local network and connected to Nobø Update Server, but not Nobø Proxy Server.4 x blink: Connected to local network and connected to Nobø Proxy Server, but not Nobø Update Server.Continuous blinking for around 45 seconds: Automatic software update in progress.No light: Nobø HUB has no power. The update feature works in such a way that the Nobø HUB automatically downloads and installs new versions of its software. This is done when the Nobø HUB is powered on, and regularly about every 18 hours. Ongoing updates are shown by the green light quickly blinking on the Nobø HUB for about one minute.
Common firewall configurations in network routers intended for private homes need no modifications from default settings. However, if you have a special/advanced network setup (e.g. within a company) then you must consider the following: The network must allow the Nobø HUB outgoing TCP traffic on port 80 for the automatic update function to work.
|
| The network router has an error that prevents the system from working properly. |
More info |
to the top
Receiver does not change status
Cause |
Action |
Receiver is switched off. |
Switch on the receiver. |
Receiver is not placed in the correct zone. |
Make sure the ID code is correct and placed in the right zone. Press the receiver icon in the zone settings screen to see the ID code. |
Signals from Nobø HUB do not reach the receiver. | If possible, move Nobø HUB closer to the receiver to see if this corrects the error. Alternatively, place a different receiver between the two, to act as repeater between Nobø HUB and the receiver. |
Receiver is out of order. |
Replace the receiver with a new one. (Contact your local dealer). |
to the top
FROM-TO override is not activated at the right time
Cause |
Action |
Start time is set incorrectly. |
Press and hold the override in the Circle Menu and check/correct the time. |
to the top
No light when Nobø Switch is operated
Cause |
Action |
Nobø Switch is out of range from Nobø HUB |
Try moving the Nobø Switch and Nobø HUB closer together. Some building materials, like reinforced concrete, massive timber etc., may reduce the signal range. In such cases, moving the Nobø Switch or Nobø HUB 1-2 meters to the side could be enough to avoid the obstacle. |
| Nobø Switch ID-code is wrong. |
Try removing Nobø Switch from the Nobø HUB, and add the Nobø Switch again using Automatic search. When the APP is searching, press the center of the Nobø Switch so that all four corners are activated. |
Nobø Switch has not been paired with Nobø HUB |
Try removing Nobø Switch from the Nobø HUB, and add the Nobø Switch again using Automatic search. When the APP is searching, press the center of the Nobø Switch so that all four corners are activated. |
The battery is empty |
Replace the battery and try again. |
to the top
Nobø Switch lights up when operated, but the zones do not react
Cause |
Action |
More than one function pressed at once. |
If more than one switch on the ECOSWITCH are pressed at once, the zones will not react, even though the ECOSWITCH lights up. Try pressing closer to the corner. |
«Disable overrides» is activated in the zone, locking it to Normal Weekly Program. | Check the zone overview to see if the zone is locked to Normal Weekly Program. |
to the top
My Safir Glass heater or R80 TXF 700 is flashing green, although the heater is not supposed to be in frost protection mode
Cause |
Action |
No temperature sensor added to the zone. |
Add a Nobø Switch and check the checkbox for using it as a temperature sensor in the same zone as the Safir/R80 TXF700 |
The temperature sensor is out of range from Nobø HUB. |
If the temperature sensor is out of range and does not report back to Nobø HUB in several hours, the heaters connected to the sensor will automatically go into frost protection mode.
Try moving the Nobø Switch and Nobø HUB closer together. Some building materials, like reinforced concrete, massive timber etc., may reduce the signal range. In such cases, moving the Nobø Switch or Nobø HUB 1-2 meters to the side could be enough to avoid the obstacle. |
The temperature sensor (Nobø Switch) battery is empty. | Replace the Nobø Switch battery and try again. |
The zone uses a TCU700 or TXB700 room thermostat, but Safir/R80 TXF700-receivers are also installed on the Nobø HUB. |
When using a TCU700 or TXB700 room thermostat, the heaters (Safir/R80 TXF700) must be added to the room thermostat and NOT to the Nobø HUB. Only the room thermostat is added to Nobø HUB. |
to the top
Nobø HUB does not adapt to daylight saving time.
Cause |
Action |
Nobø HUB has no automatic functionality for adapting to daylight saving time.
|
Open the app while connected to the same local network as Nobø HUB. This allows Nobø HUB to set the time equal to that of the phone or tablet. |
to the top
PRIVACY POLICY FOR THE NOBØ ENERGY CONTROL APP AND SYSTEM
This
privacy policy has been compiled to better serve those who are concerned with
how their 'Personally Identifiable Information' (PII) is being used online. PII
is information that can be used on its own or with other information to
identify, contact, or locate a single person, or to identify an individual in
context. Please read our privacy policy carefully to get a clear understanding
of how Glen Dimplex collects, uses, protects and otherwise handles your
Personally Identifiable Information in accordance with our Nobø Energy Control
system.
What personal information do we collect from
people?
We log
traffic metadata, which means we log data about the communication (containing
the IP address and Hub serial number), but not the contents of the
communication messages/commands sent between the app and the Hub. All traffic
via the Internet is encrypted. Glen Dimplex Nordic does not have access to the
encryption keys, they are only stored on each Nobø Hub and in the app on each mobile
device. In general, Glen Dimplex Nordic is unable to identify any people based
on this information.
When do we collect information?
We collect
the information when you connect to and use Nobø Energy Control via the
Internet.
How and why do we use your information?
The
information is imperative in order to operate the system, to perform the necessary
maintenance and for customer support. Because of this, provision of this
potentially personally identifiable information is required to be able to use
the system.
How do we protect your information?
All traffic
via the Internet is encrypted. Glen Dimplex Nordic does not have access to the
encryption keys. The keys are only stored on each Nobø Hub and in the app on
each mobile device. Your Nobø Energy Control setup and settings are stored on
your Hub, and nowhere else.
PII is
available only to relevant authorised personnel at Glen Dimplex. Server logs
are retained for as short a time as possible, while maintaining our ability to
operate and support the system. We make sure that the logs are no more than two
months old, and often less.
Third-party disclosure
We do not
sell, trade, or otherwise transfer your Personally Identifiable Information to 3rd
parties.
Other
We do not
use cookies for tracking purposes. We do not specifically market to children under
the age of 13 years. We do not collect your e-mail address.
Additional rights according to EU GDPR
Users in
the EU and European Economic Area (EEA) have the right to request access to
PII, rectification or erasure of PII, restriction of processing of PII, to
object to processing of PII and the right to data portability. They also have
the right to lodge a complaint with a supervisory authority.
Contacting Us
If there
are any questions regarding this privacy policy, you may contact us at www.glendimplex.no
and support@glendimplex.no.