Nobø HUB setup
Important info:
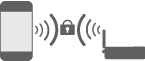
Nobø HUB communicates with wireless radio signals. Nobø HUB must be mounted on a wall for optimal range. Some building materials, like reinforced concrete, massive timber etc. may reduce the signal range. In the case of signals not reaching a receiver, moving the Nobø HUB 1-2 metres to the side could be enough to avoid the obstacle. Install the system, and make sure all your receivers react properly, before final mounting of the Nobø HUB on the wall.
System setup:
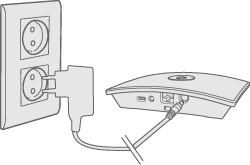
Connect the power cord to the Nobø HUB and plug it into a power outlet.
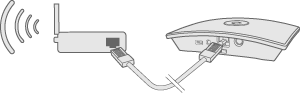
Nobø HUB must be connected by cable (ethernet cable) to a local network with a wireless router. The cable can be connected directly to the router, or to a wall outlet elsewhere in the building.
Make sure your smartphone or tablet is connected to the same wireless network and start NOBØ Energy Control APP. When connected to power and a local network, Nobø HUB will transmit its ID-code on the wireless network.
To install Nobø HUB, follow the APP setup wizard. The APP will search for an Nobø HUB, and display the results on the screen. Press the ID code corresponding to your Nobø HUB.
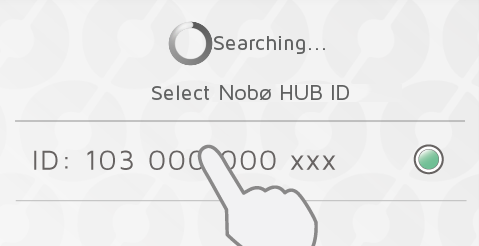
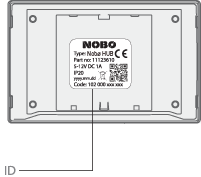
If more than one Nobø HUB is connected to the same wireless network, the correct one must be selected in the setup wizard. Check the ID-code at the back of the Nobø HUB and select the corresponding ID in the APP.
(NB! Only one Nobø HUB can be installed at a time.)
For security reasons, you will be asked to type in the 3 last digits of your Nobø HUB ID-code. The ID-code is at the back of your Nobø HUB.
Do not mount the Nobø HUB on the wall until the setup is finished. In case you need to check the ID-code again.
Control via the Internet
When the app has been connected to an Nobø HUB on a local network, the app can also be operated remotely via the Internet.
The system security is based on your local network being protected from unauthorized access. Please make sure your local, wireless network is password protected against intruders. Be careful when allowing others to access your network. Anyone who has connected their app to your Nobø HUB, will later be able to control it remotely via the Internet.
When the app and the Nobø HUB connect via a local network, they automatically exchange encryption keys. This is to ensure a secure, encrypted communication via the Internet by a robust AES encryption. The encryption keys are generated by the app, and are saved in the app and the Nobø HUB to prevent any online surveillance.
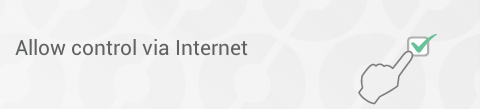
If you do not wish to control your system via the Internet, the "Allow control via Internet"-option can be switched off under “Settings”. This option can only be changed when connected to the local network. If the Internet control option is switched off and then back on again, all previous users (apps) are reset from accessing the Nobø HUB via the Internet. To regain access, the app and the Nobø HUB must exchange new encryption keys. This is done simply by starting the app while connected to the local network.
Advanced Nobø HUB setup
If the search for Nobø HUB in the setup wizard fails, and no HUBs are found, press “advanced” to install the Nobø HUB manually.
For advanced installation, you will need the IP-address allocated to the Nobø HUB on your network. The IP-address can be found by logging on to the router. See your wireless router manual, or ask your internet service provider for more info.
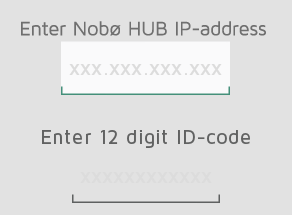
In the advanced setup screen, enter both the IP-address AND the entire 12 digit ID-code from the back of your Nobø HUB, and press “verify”.
If unsuccessful, please check the following:
(only relevant for users with special network configuration)
- Make sure there is no firewall between your wireless and cabled network (TCP-traffic must be allowed on port 27779.)
- Make sure your wireless network (connected to the APP) is the same logical local network (LAN) as your cabled network (connected to the Nobø HUB)
- Make sure your network allows UDP broadcast traffic (on IP 255.255.255.255, port 10000).